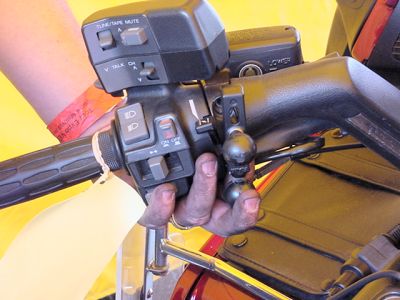
GPS for Motorcycles - I Buy a Garmin 2610 GPS - Mounting the GPS By Walter F. Kern R-A-M Base Mount Installation The Garmin 2610 GPS has a single connector when used in a car. You just slide the connector onto the back of the unit and plug the other end into your cigarette lighter. There is an audio device in the line with a speaker in it so you can hear the voice commands that guide you to your destination. The equivalent connections to hook it up to a motorcycle are more complex. I won't be able to show you pictures of all the steps so I will try to talk through some of the steps. Basically, you have to mount the GPS somewhere in the handlebar area. You need to buy a cradle to hold it securely. On the back of the cradle is fastened a Cradle Ball Adapter. That ball is connected to a Short R-A-M (Round-A-Mount) Arm. The other end of the arm clamps down on another ball that is part of a R-A-M HB2 Base Mount mounted on the handlebars somewhere. Shown below is Sean mounting a R-A-M HB2 Base Mount to the left side. That extra ball on the bottom serves no purpose for this installation. Later you will see how the connections are made to link the GPS to the battery for power. The GPS is also connected to the bike's intercom to gain access to the earphones in your helmet so you can hear the voice commands spoken by the GPS. By the way, the 2610 uses a woman's voice.
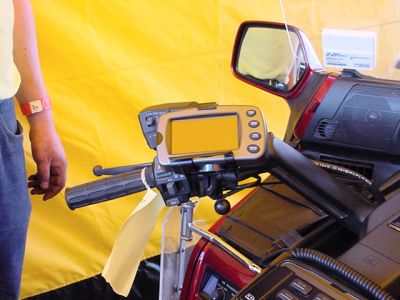
Garmin 2610 Mounted in Cradle Sean fastened the R-A-M HB2 Base Mount center ball to the Short R-A-M Arm and the ball on the Cradle Ball Adapter to the other end of the Short R-A-M Arm. He then moved the complete unit around to get a good viewing angle to see the GPS screen and then tightened down the thumbscrew to lock the arm to the two balls. All these components may be viewed on the CycleGadgets Web site. The complete mechanical hookup is shown in the following picture. Then, Sean proceeded to do the electrical hookup as described in the following steps.
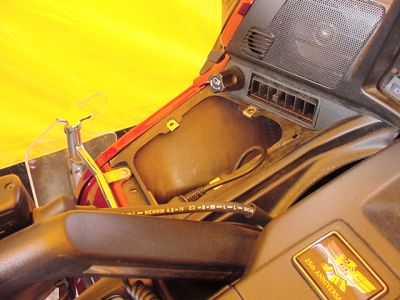
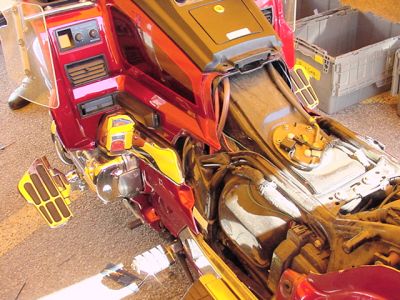
Removal of Left Fairing Pocket Four separate cables have to be connected together and to the bike's wiring harness. The driver's headset lead is followed back until you find a 6-pin plug. That is removed and the Intercom Harness is connected into both halves of the plug. Then the Single Set cable is connected to the Intercom Harness. Next, the Single Set cable is connected to the Device Harness. One lead of the Device Harness goes to the Power Harness and the other end contains the specific connector that goes to the GPS. All these cables get strung together and placed under the fairing pocket. The lead to the power source (battery) will be routed shortly. The picture shows the left fairing pocket removed. Sean then made the cable connections just described.
Seat Off and Left Panel Removed In order to find space to route the power lead from the Power Harness, Sean removed the left side panel covering the fuse block. He then needed to remove the seat. That was a little more involved since I had a backrest that had bolt heads that were non-standard. These bolts hold the seat on but required a different wrench to loosen. Of course, Sean had to look around and find the right wrench. I also had more junk bungeed to the back seat and had to remove all that prior to taking off the seat. Here's the result showing the seat removed and the left panel off. Then the center panel on the bike -- that contains the radio -- had to be loosened and lifted up so the power lead from the Power Harness could be slipped through to the left side of the bike near the fuse block. Then Sean was ready to connect the power cable to the battery.
=> Go to Page 3: Finishing Up

|
|
|||||||||||||||||||||||||
© 2015 Walter F. Kern. All rights reserved.
|
||||||||||||||||||||||||||